Chicago North Shore Paver Lights: Tips for Flawless Installation
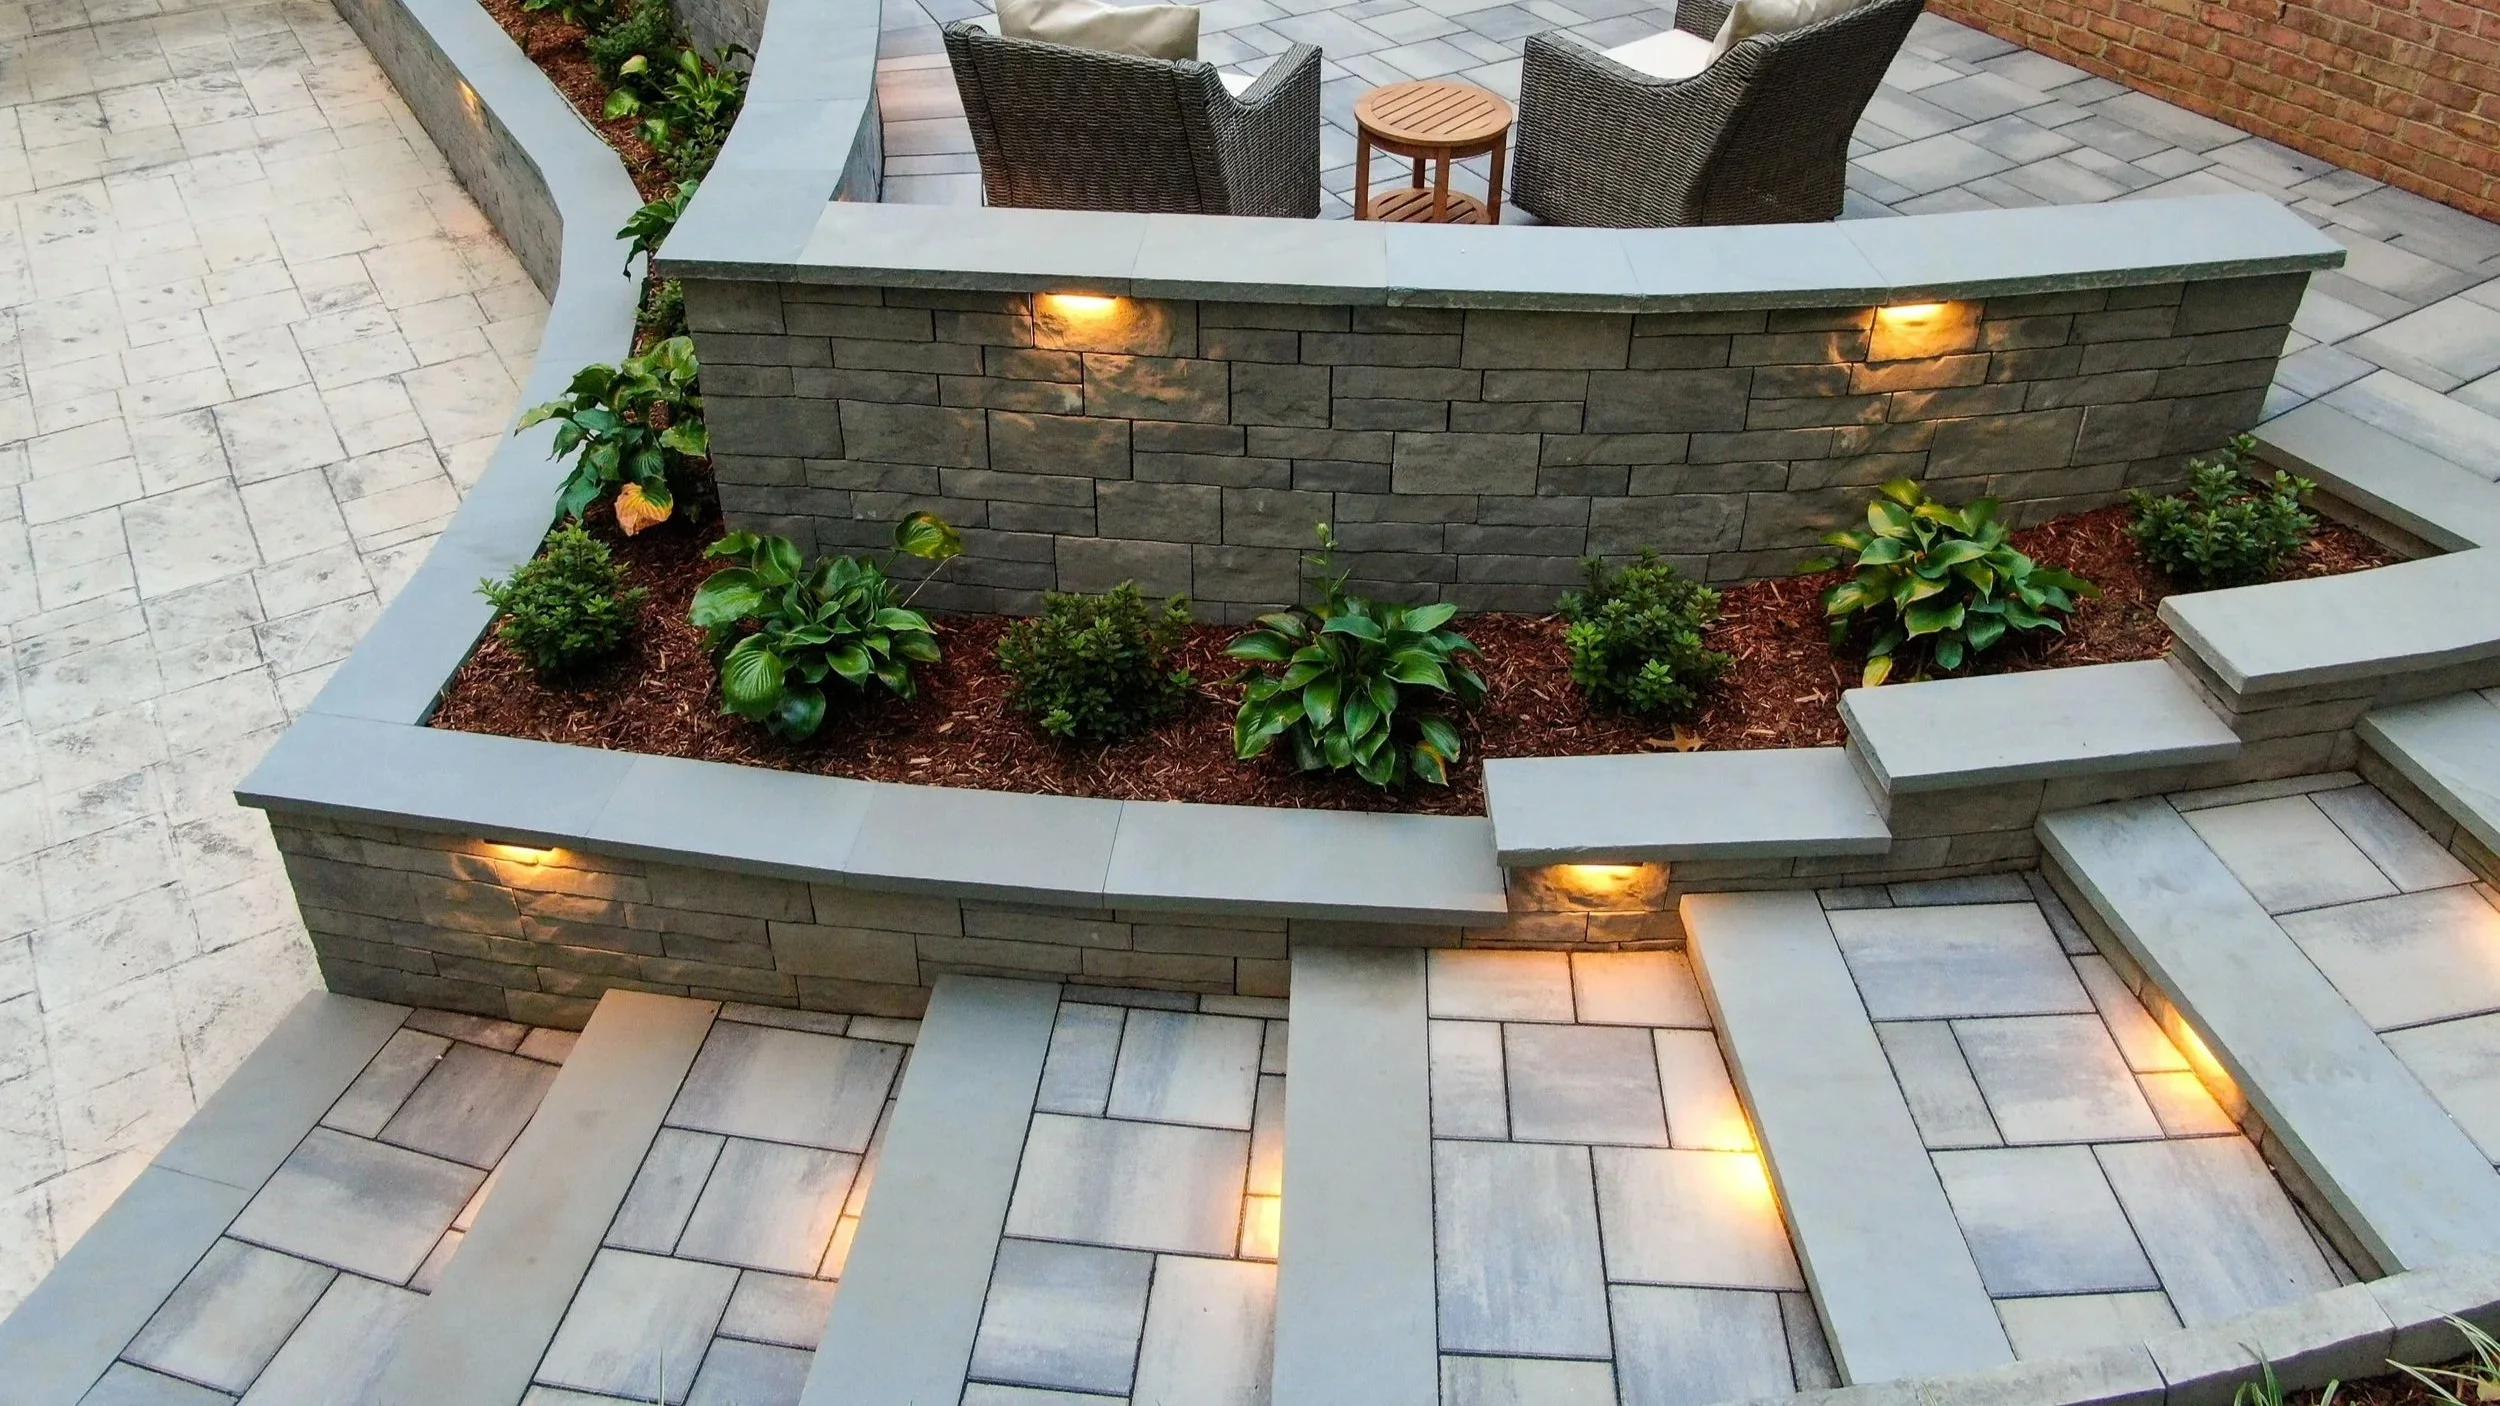
Chicago North Shore paver lights rank among the most rewarding upgrades a homeowner can add to a hardscape project. They boost curb appeal, improve nighttime safety, and completely transform a driveway or patio after dark. As October shortens the days across Winnetka, Wilmette, and Glencoe, that glow matters even more, especially once the sun sets well before dinner.
That said, the finished result depends far less on the fixture itself than on the planning that happens before the first paver goes down. Fixture size, spacing, voltage, and even the final compaction pass all shape whether a layout looks elegant or overdone. As a result, the best installations follow a consistent set of habits, from the first consultation through the final walkthrough. Moreover, homeowners who understand those habits can ask sharper questions and set clearer expectations with their installer. Ultimately, that preparation leads to a driveway, walkway, or patio that looks just as polished at 9 p.m. as it does at noon, season after season.
Designing Chicago North Shore Paver Lights Around the Homeowner’s Vision
Every homeowner pictures paver lighting a little differently. The first best practice is to match the fixture to both the desired glow and the paver size. Some homeowners want a soft, subtle accent, while others want the lighting to become a defining part of the design.
On a 9-inch border paver, for example, the options typically scale like this:
0.5x9 fixtures for subtle, understated ambiance
2x9 or 3x9 fixtures for a little more light along walkways and borders
6x9 fixtures for stronger illumination around gathering areas
9x12 fixtures for large driveways where the lighting should truly stand out
However, choosing a size on paper rarely tells the whole story. Many experienced installers keep manufacturer sample fixtures on hand, connect them to a small 12-volt transformer after dark, and let homeowners see the actual effect in person.
Spacing deserves the same hands-on approach, since lights set too close can look overlit while lights set too far apart lose their impact. Most projects look best with fixtures roughly 6 to 8 feet apart; that said, no single rule fits every property. Temporarily connecting two to four lights at night and adjusting them until everyone likes the look removes the guesswork. Above all, homeowners should approve both fixture size and spacing before ordering or installing anything.
Powering Chicago North Shore Paver Lights for the Long Haul
Behind every beautiful glow sits an electrical plan, and getting it right from the start protects both the fixtures and the homeowner’s investment. Most paver lights run on 12-volt low-voltage systems, so verifying the voltage before final connections is essential. Connecting a fixture to 120 volts destroys it instantly, and even the wrong low-voltage transformer can damage the LEDs over time.
Transformer sizing matters as much. Many installations calculate total wattage and stop there. However, twenty 3-watt lights totaling 60 watts don’t call for a 60-watt transformer. Transformers perform best with extra capacity, so stepping up to a 200- or 300-watt unit is a smart move whenever possible. That added headroom also gives Highland Park and Lake Forest homeowners room to add landscape lighting, hardscape lighting, or tree lights later without replacing equipment.
Wiring routes also deserve forethought, especially where cable must cross a concrete driveway, garage apron, or sidewalk. In those spots, running the wire through conduit protects it from damage and makes future repairs much simpler. If a wire ever needs replacing, an installer can pull a new one through the conduit rather than cutting into finished concrete.
Protecting the Finished Paver Lighting Installation
Once the fixtures are set and the polymeric sand has been swept into the joints, compaction is the final step, and it requires a careful touch. A plate compactor locks pavers into place beautifully across open areas. On the other hand, running one directly over or beside a fixture risks cracking the glass or damaging the housing. Instead, careful installers switch to a hand tamper around each light, securing the surrounding pavers while keeping each fixture intact.
Long-term planning extends beyond installation day. Leaving one or two spare fixtures with the homeowner is a simple practice that pays off years down the road. If a fixture gets damaged by a plow blade or a dropped tool, having a matching replacement on hand keeps repairs quick and the layout consistent. That matters because manufacturers occasionally update designs or discontinue products altogether, making an exact match surprisingly hard to find. In Kenilworth and other North Shore communities, where homeowners invest in cohesive outdoor spaces, a mismatched replacement would stand out immediately. Consequently, a few spare fixtures stored in the garage serve as inexpensive insurance for the overall design.
Chicago North Shore Paver Lights Built for Years of Evenings
Most paver lighting challenges disappear long before the first paver is set, provided you plan up front. Choosing the right fixture size, testing the spacing after dark, and securing homeowner approval set the visual foundation for the entire project.
From there, three steps protect the system for years to come:
Confirm the correct voltage.
Size the transformer with room to grow.
Run conduit beneath concrete.
Finally, careful compaction around each fixture and a few spares left behind keep the project looking consistent long after the crew packs up. Together, these habits prevent frustrating do-overs, save time, and give homeowners an outdoor space they can enjoy well into the evening. As fall settles across the North Shore and evenings grow darker, now is the perfect time to plan a lighting upgrade. To bring that vision to life, contact the Chicago North Shore specialists at Pappas Landscape & Design.